Industrial endoscopes serve as the eyes of technicians working across aviation, automotive, manufacturing, and energy sectors, enabling visual inspections of turbine blades, engine cylinders, weld seams, and pipeline interiors without costly disassembly. These precision instruments navigate confined spaces where human vision cannot reach, making them indispensable for preventive maintenance and quality assurance programs. Yet despite their robust engineering, industrial endoscopes remain sensitive tools that demand consistent care. Neglecting routine maintenance or mishandling components leads to degraded image quality, mechanical failures, and ultimately premature replacement—expenses that can run into thousands of dollars alongside the operational downtime they cause.
This guide delivers practical strategies for extending your borescope’s service life and maintaining peak performance. From understanding critical features like side-view mirrors and articulation systems to establishing effective cleaning protocols, troubleshooting common malfunctions, and knowing when repairs are feasible, you’ll gain actionable knowledge that protects your investment and keeps inspections running smoothly for years to come.
Mastering Essential Borescope Features for Optimal Use
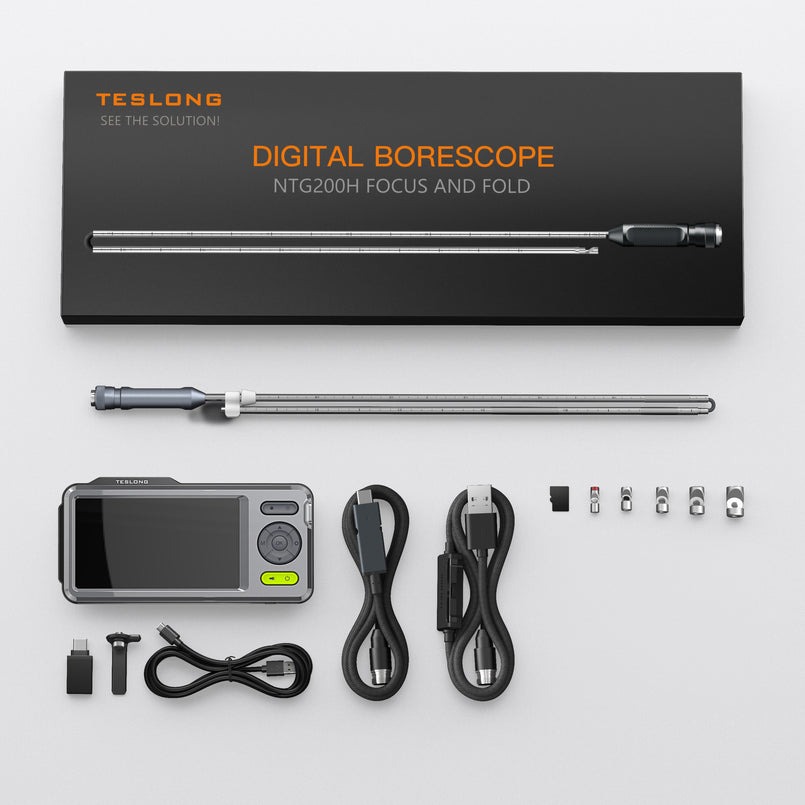
An industrial endoscope, commonly called a borescope, is a flexible or rigid optical instrument designed to visually inspect internal surfaces of machinery, structures, and components without disassembly. Technicians rely on these devices across diverse applications—examining turbine blade erosion in power plants, detecting corrosion inside heat exchangers, verifying weld integrity in pipelines, and assessing cylinder wall conditions in engines. Understanding your instrument’s core features directly influences both inspection quality and equipment longevity.
Articulation capability determines how effectively the probe tip navigates bends and corners within confined passages. Four-way articulation systems allow precise steering, but the internal cables driving this movement are among the most vulnerable components. Forcing articulation beyond its designed range or operating it under tension accelerates cable wear. Image resolution and sensor quality dictate defect detection capability—higher resolution cameras reveal hairline cracks and micro-pitting that lower-quality sensors miss entirely. LED lighting intensity and color temperature affect how surface conditions appear on screen, and maintaining consistent illumination requires keeping light guides clean and undamaged. When selecting a borescope, match probe diameter and working length to your most common inspection cavities, choose resolution appropriate for your defect detection requirements, and ensure the articulation range accommodates the geometry you’ll encounter most frequently.

Leveraging Side-View Mirrors for Enhanced Inspections
Side-view mirrors attach to the probe tip to redirect the camera’s field of view at angles typically ranging from 45 to 120 degrees, enabling inspection of surfaces perpendicular to the insertion path—such as cylinder walls, cross-bore intersections, and valve seats that forward-viewing cameras cannot adequately capture. These small optical accessories dramatically expand inspection coverage without requiring additional probe insertions from different access points.
Operating side-view mirrors safely begins with proper attachment. Always secure the mirror adapter when the probe is outside the inspection cavity, verifying the locking mechanism is fully engaged before insertion. Forcing the probe through tight passages with a mirror attached risks catching the adapter on edges, potentially snapping it off inside the component being inspected. Rotate the probe slowly and deliberately when using side-view attachments, as rapid spinning creates centrifugal stress on the mirror mount. After each use, clean the mirror surface with a lens-grade microfiber cloth dampened with isopropyl alcohol, wiping in a single direction rather than circular motions that can redistribute contaminants. Inspect the mirror for scratches or coating degradation regularly—a compromised mirror surface scatters light and produces hazy images that technicians might mistake for equipment malfunction rather than a simple accessory replacement need.
Implementing Proactive Borescope Maintenance Practices
Regular borescope maintenance isn’t merely a recommendation—it’s the single most effective strategy for preventing unexpected failures during critical inspections. A well-maintained instrument delivers consistent image quality, responds predictably during articulation, and avoids the cascading damage that occurs when small issues go unaddressed. Establishing a structured maintenance schedule transforms reactive repairs into manageable routine tasks that take minutes rather than days of downtime.
Daily maintenance centers on visual inspection of the insertion tube for kinks, abrasions, or exposed braiding that signals sheath damage. Weekly tasks should include checking articulation responsiveness through its full range of motion, inspecting connector pins for corrosion or bent contacts, and verifying LED output consistency across all lighting elements. Monthly maintenance demands more thorough attention: examine the bending section rubber for cracks or swelling, test waterproof seals if your unit is rated for liquid immersion, and verify calibration accuracy against a known reference target. Battery care often gets overlooked—lithium-ion packs in portable units should be stored between 40-80% charge when not in active use, and charging cycles should complete fully rather than being interrupted repeatedly, which degrades cell chemistry over time.
Daily and Post-Use Cleaning Protocols
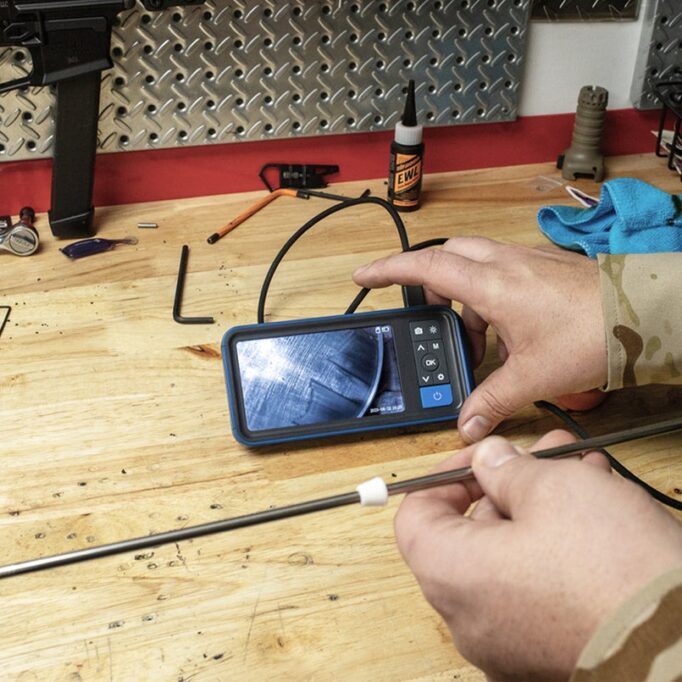
Immediately after each inspection, wipe the entire insertion tube with a soft lint-free cloth dampened with warm water to remove oils, particulates, and chemical residues before they dry and bond to surfaces. For the objective lens, apply a single drop of optical-grade isopropyl alcohol (99% concentration) to a lens tissue and gently wipe from center outward—never use paper towels, compressed air with propellant residue, or acetone-based solvents that attack lens coatings and adhesives. Dry all components thoroughly before retracting the probe, as trapped moisture promotes fungal growth on internal optical elements. Pay particular attention to the articulation joint area where debris accumulates in the corrugated bending section, using a soft-bristled brush to dislodge particles that could restrict movement.
Long-Term Storage and Environmental Protection
Store your borescope in its manufacturer-provided case with the insertion tube loosely coiled—never kinked or bent below the minimum bend radius specified in your manual. The storage environment should maintain temperatures between 10-35°C with relative humidity below 60% to prevent condensation on optical surfaces and corrosion on electronic contacts. Place silica gel desiccant packets inside the case and replace them monthly or when indicator beads change color. For instruments stored longer than 30 days, perform a brief power-on and articulation check every two weeks to prevent lubricant settling and cable memory formation that causes sluggish response upon return to service. Keep the unit away from magnetic fields, solvents, and direct sunlight, which degrades rubber components and fades display screens over time.
Troubleshooting Common Borescope Issues Effectively
Even well-maintained borescopes encounter performance issues that can disrupt inspection schedules. Recognizing symptoms early and applying systematic diagnostics prevents minor glitches from escalating into major failures. The most frequently reported problems fall into four categories: image degradation, connectivity failures, lighting malfunctions, and articulation difficulties. Each has distinct root causes that respond to targeted interventions when approached methodically.
Blurry or foggy images typically stem from contamination on the objective lens, internal condensation, or a damaged optical element. Before assuming the worst, clean the lens thoroughly and allow the unit to acclimate if moved between temperature extremes—thermal shock causes temporary fogging that resolves within minutes. Connectivity failures between the probe and display unit often trace back to damaged cable pins, corroded contacts, or loose connections at the handset junction. Power cycling the system and reseating all connections resolves roughly half of these incidents. LED lighting that flickers, dims unevenly, or fails completely may indicate a failing light guide fiber bundle, a loose internal connection, or simply end-of-life for individual LEDs. Articulation that feels stiff, responds asymmetrically, or fails to hold position signals cable tension issues, debris in the bending section, or worn pulleys in the control mechanism. Always disconnect power before investigating mechanical issues, and never force an articulation system that resists normal input—doing so risks snapping internal cables that require factory repair.
Step-by-Step Diagnostic Checklist
Begin every troubleshooting session with a visual exterior inspection: examine the insertion tube for visible damage, check connector pins under magnification for bending or discoloration, and verify that all mechanical controls move freely. Next, power on the unit and observe the startup sequence—error codes or unusual boot behavior narrows the problem immediately. Test the image by pointing the camera at a well-lit reference card; if the image appears sharp on one side but soft on the other, the lens may be decentered rather than dirty. Check articulation by slowly moving through all four directions, noting any grinding sensations, delayed response, or reduced range compared to the unit’s specifications. For side-view mirror issues, remove the attachment and verify that the forward image is clear—if image quality improves, the mirror surface needs cleaning or replacement rather than the camera itself. Update firmware if your manufacturer has released patches, as software-related display glitches and communication errors are frequently resolved through updates that take only minutes to install. Document every symptom before attempting fixes, creating a reference that helps professional technicians diagnose persistent issues faster if your initial efforts don’t resolve the problem.
Repairing Borescopes: DIY and Professional Solutions
Not every borescope malfunction requires a trip to the manufacturer’s service center. Understanding the boundary between safe DIY repairs and situations demanding professional intervention saves both money and prevents well-intentioned fixes from causing irreversible damage. The general rule is straightforward: external, accessible components are fair game for skilled technicians, while anything involving sealed optical assemblies, internal wiring, or articulation cable tensioning belongs in professional hands.
Cost-benefit analysis should guide every repair decision. If a repair estimate exceeds 50-60% of the replacement cost for an aging unit, investing in new equipment often makes more sense—especially when newer models from manufacturers like Teslong offer improved resolution and durability at competitive price points. However, high-end borescopes with specialized probe configurations frequently justify professional repair even at significant cost, since replacement units with identical specifications may require long lead times. When seeking professional service, choose authorized repair centers that use genuine replacement parts and provide post-repair calibration verification. Request a detailed diagnostic report before authorizing work, and ask whether the repair includes warranty coverage on replaced components. Keep records of all repairs performed, as service history affects resale value and helps predict future maintenance needs based on component lifecycle patterns.
Basic DIY Repair Techniques
Several common repairs fall within the capability of careful technicians equipped with basic tools. Replacing a damaged insertion tube sheath requires a heat-shrink sleeve matched to your probe diameter, a heat gun set to low temperature, and patience to ensure the new covering sits smoothly without restricting articulation. Corroded connector pins can be carefully cleaned using a fiberglass scratch pen followed by contact cleaner spray—never sand or file pins, as dimensional changes prevent proper mating. Replacing worn O-rings on waterproof models restores immersion ratings when the original seals show cracking or compression set; use only manufacturer-specified replacement rings and apply a thin film of silicone grease during installation. For LED replacement on units with modular light assemblies, desolder the failed element and match the replacement precisely in wavelength and forward voltage to maintain uniform illumination. Essential tools for these repairs include precision screwdrivers, anti-static tweezers, a magnifying headset, isopropyl alcohol, and lint-free applicators. Always work on a clean, static-free surface, photograph each disassembly step for reassembly reference, and stop immediately if you encounter sealed components or unfamiliar internal configurations that weren’t covered in your unit’s service documentation.
Building a Complete Borescope Care Strategy for Lasting Performance
Protecting your industrial endoscope investment comes down to four interconnected disciplines. First, understanding your instrument’s features—from articulation mechanics to side-view mirror operation—ensures you use each component within its designed parameters, preventing unnecessary stress and wear. Second, consistent maintenance routines covering daily cleaning, weekly functional checks, and monthly deep inspections catch developing problems before they compromise inspection results or cause mechanical failure. Third, systematic troubleshooting skills allow you to distinguish between simple fixes like lens contamination and serious issues requiring professional attention, minimizing downtime while avoiding actions that worsen existing damage. Finally, knowing the boundary between safe DIY repairs and situations demanding factory service protects you from turning a minor issue into an irreparable one.
These practices collectively translate into tangible benefits: fewer unexpected failures during critical inspections, lower lifetime ownership costs, and consistently reliable image quality that supports confident decision-making. Whether your borescope examines jet engine turbines or automotive cylinder bores, the care principles remain the same. Start implementing a structured maintenance schedule today, document your equipment’s condition over time, and treat your borescope as the precision optical instrument it is rather than a disposable tool. The return on this modest investment of time and attention will be measured in years of dependable service.