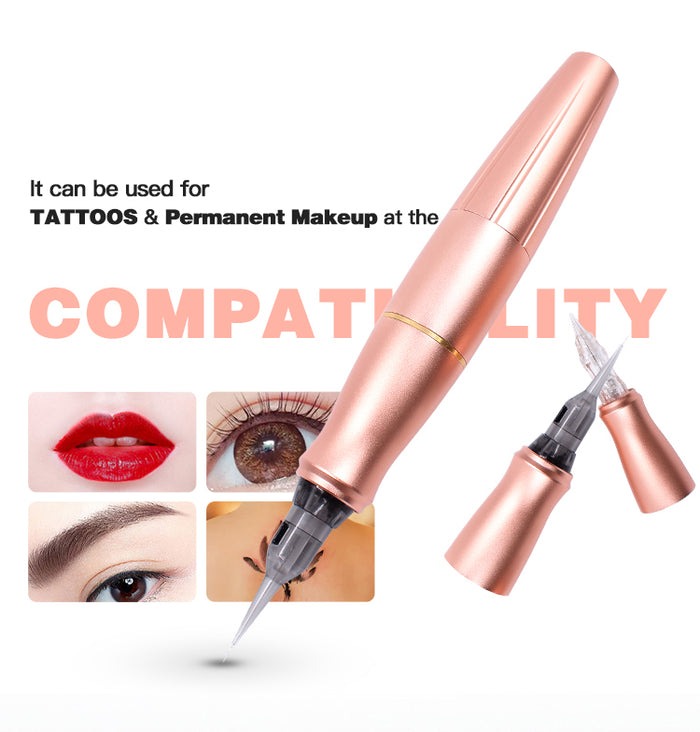
The quality of PMU ink can make or break a tattoo, whether you’re creating delicate eyebrow microblading or a bold body art design. For beginner tattoo artists, choosing the right ink feels overwhelming—hundreds of brands compete for attention, each promising vibrant color and lasting results. Yet not all inks deliver on safety, consistency, or compatibility with starter equipment. The wrong choice can lead to allergic reactions, patchy healing, or colors that fade unpredictably within weeks.
This guide cuts through the confusion by breaking down exactly what makes PMU ink reliable for easy-to-use tattoo kits. You’ll learn how to evaluate ink quality, match formulations to your specific equipment, and avoid costly mistakes that plague new artists. Whether you’re practicing on synthetic skin or preparing for your first real client, understanding your ink is the foundation of professional results. Let’s simplify your search so you can start tattooing with confidence and peace of mind.
Understanding PMU Ink: A Beginner’s Guide to Essential Tattoo Equipment
PMU ink—short for Permanent Makeup ink—is a specialized pigment formulated for cosmetic tattooing procedures like microblading, lip blushing, and eyeliner enhancement. Unlike traditional tattoo ink designed for deep dermal placement in body art, PMU ink sits in the upper layers of skin and uses smaller, more refined pigment particles. This distinction matters because PMU formulations are engineered to fade gradually and predictably over one to three years, rather than lasting a lifetime with potential color shifts toward blue or green tones.
The composition of PMU ink prioritizes biocompatibility and precision. Most quality formulations use iron oxides or organic pigments suspended in purified water or glycerin bases, creating a consistency that flows smoothly through fine-gauge needles without clogging. This viscosity is critical when working with tattoo kits designed for beginners, as thicker or poorly formulated inks can cause machine stuttering and uneven pigment deposit. When paired with the right tattoo cartridges, PMU ink delivers controlled saturation that forgives minor technique errors—making it an ideal starting point for artists building their skills. Understanding this foundation helps you select products that work with your equipment rather than against it.
Key Features of the Best PMU Ink for Safe and Vibrant Results
Selecting PMU ink based on marketing claims alone is a recipe for disappointment. The best formulations share specific, measurable qualities that directly impact your work’s safety and longevity. For beginners using tattoo kits, understanding these features prevents wasted money on products that underperform or, worse, harm clients.
Safety and Sterility: Non-Negotiables for PMU Ink
Every PMU ink you consider should meet strict safety benchmarks before anything else. Look for products manufactured in facilities with ISO 13485 certification, which confirms medical-grade production standards. The ingredient list should be fully transparent—reputable brands publish complete compositions showing iron oxide or organic pigment bases without heavy metals like nickel, lead, or mercury. FDA compliance matters significantly; while the FDA doesn’t formally approve tattoo inks, compliant manufacturers voluntarily follow cosmetic safety guidelines and use only permitted colorants. Hypoallergenic formulations reduce the risk of adverse reactions, particularly important when working on sensitive facial skin during microblading or lip procedures. Each bottle should arrive individually sealed and gamma-sterilized, eliminating bacterial contamination before the ink ever touches a needle.
Color Performance and Longevity in Tattoo Applications
Beyond safety, the ink must perform consistently across applications. High pigment concentration means fewer passes over the skin to achieve desired saturation, reducing trauma and improving healing outcomes. Quality PMU ink fades evenly without shifting to unnatural undertones—warm browns shouldn’t turn orange, and blacks shouldn’t migrate toward blue-gray. This predictable fading behavior comes from precise pigment particle sizing, typically between one and four microns. For beginners, this consistency translates directly to better results with tattoo cartridges because the ink flows uniformly through the needle grouping without pooling or skipping. Color stability across different skin types—oily, dry, or combination—separates professional-grade ink from budget alternatives that look different on every client.
How to Choose the Best PMU Ink for Your Tattoo Kits and Cartridges
Choosing PMU ink that works seamlessly with your equipment requires a systematic approach rather than grabbing whatever appears first in search results. Start by identifying your primary application—microblading demands thinner, more fluid inks while machine work with rotary pens accommodates slightly thicker formulations. Once you know your use case, evaluate brands by checking how long they’ve operated in the permanent makeup industry and whether working professionals actually use their products in real client sessions. A company with five or more years of consistent market presence and visible professional endorsements typically delivers more reliable formulations than newcomers making bold claims without track records.
Assessing Compatibility with Tattoo Kits and Equipment
Ink viscosity determines whether your tattoo cartridges perform smoothly or create frustrating interruptions mid-session. Before committing to a full bottle, test a small quantity by loading it into your specific cartridge configuration—liner cartridges with tight needle groupings require thinner ink than shader configurations with wider spreads. Run your machine at your typical voltage setting and observe the ink flow on practice skin. The ink should travel consistently through the needle without splattering at the tip or requiring excessive machine power to push through. If you notice the ink pooling at the cartridge membrane or creating irregular dots rather than smooth lines, the viscosity doesn’t match your setup. Many manufacturers publish viscosity specifications and recommended machine voltage ranges—cross-reference these with your tattoo kit’s operating parameters before purchasing.
Prioritizing Artist-Vetted Supplies for Reliability
Professional endorsement carries weight because experienced artists have already tested products through hundreds of sessions across diverse skin types. Seek out inks reviewed specifically by PMU technicians rather than general tattoo artists, as their feedback addresses the nuances of cosmetic application. Check professional forums, training academy supply lists, and instructor recommendations—these sources filter out products that photograph well but heal poorly. When sourcing from suppliers, verify they store ink properly with temperature control and rotate stock to prevent expired products from reaching customers. Trusted suppliers also provide batch numbers for traceability and offer direct communication channels if quality concerns arise, giving you recourse that marketplace sellers cannot match.
Top Recommendations: Beginner-Friendly Tattoo Kits with PMU Ink
The most effective beginner kits bundle PMU ink with matched equipment, eliminating the guesswork of assembling components separately. Look for comprehensive starter sets that include a reliable rotary pen machine with adjustable voltage, a curated selection of PMU ink colors (typically a basic palette of black, brown, and warm neutral tones), pre-sterilized tattoo cartridges in multiple configurations, practice skin sheets, and ink cups. Brands like Biomaser have gained recognition among beginners for offering bundled kits where the included ink is specifically paired with the cartridge needle gauges provided, ensuring immediate compatibility without additional purchases or troubleshooting.
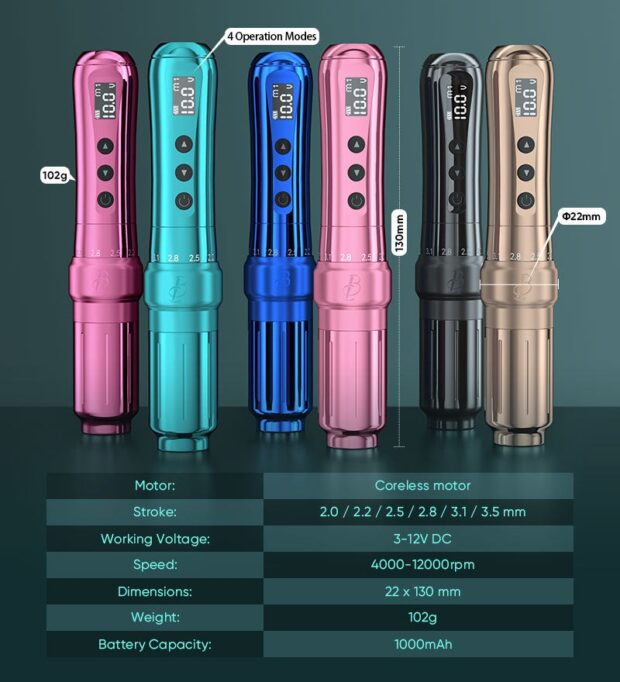
Prioritize kits designed with ergonomic pen-style machines rather than coil machines, as these offer lighter weight, quieter operation, and more intuitive handling for newcomers. Kits that include both liner and shader cartridges give you versatility to practice different techniques—fine hairstrokes for brow work alongside soft shading for lip color. An often-overlooked advantage of bundled kits is the manufacturer’s tested ink-to-machine calibration, meaning the ink viscosity already matches the motor strength and cartridge membrane resistance. This removes a significant variable from your learning curve, letting you focus entirely on developing hand technique and pressure control rather than troubleshooting equipment mismatches that drain time and confidence.
Step-by-Step Guide to Setting Up Your First Tattoo Kit with PMU Ink
Getting your first tattoo kit ready for use involves more than unboxing and powering on the machine. A methodical setup process protects both you and your practice surfaces while ensuring your PMU ink performs as intended. Following these steps builds professional habits from day one, so when you transition from practice skin to real clients, your workflow is already clean, efficient, and safe.
Preparation and Safety Protocols for Tattoo Equipment
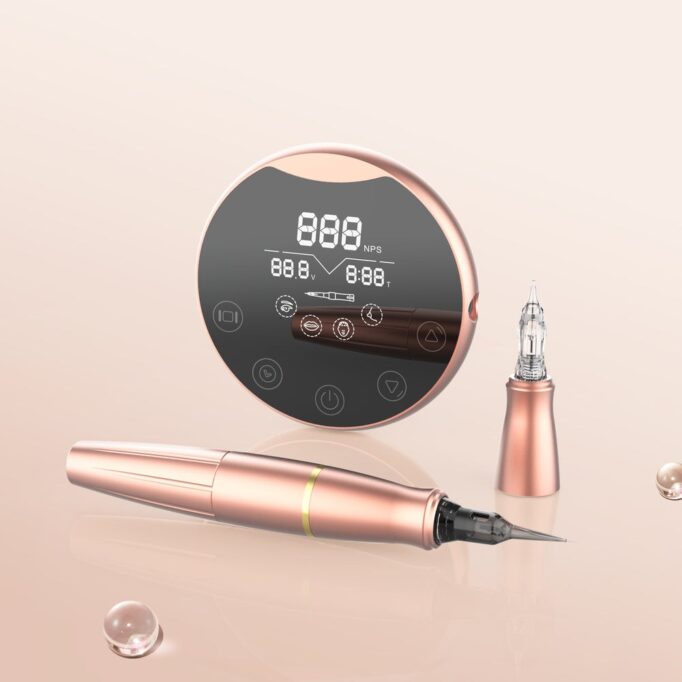
Begin by designating a clean, well-lit workspace with a non-porous surface you can disinfect between sessions. Wipe down your entire work area with a medical-grade surface disinfectant and cover it with disposable barrier film. Gather your personal protective equipment before touching any supplies—nitrile gloves, a disposable apron, and a face mask form your minimum barrier against cross-contamination. Unpack your tattoo machine and inspect the cord, grip, and power supply for any damage from shipping. Attach a fresh, sealed tattoo cartridge without touching the needle tip, confirming it clicks securely into the machine’s drive mechanism. Arrange your ink cups on a stable surface and dispense only the amount of PMU ink you need for that session using a single-use dropper or by pouring directly from the bottle without letting the rim contact the cup. Never return unused ink to the original bottle. Set your power supply to the manufacturer’s recommended starting voltage—typically between five and seven volts for PMU work—and run the machine briefly without ink to confirm smooth motor function and cartridge stability.
Ink Application Techniques with Tattoo Cartridges
Dip your cartridge needle into the ink cup at a slight angle, submerging only the tip cluster rather than flooding the entire cartridge housing. On practice skin, hold the machine like a pen at approximately a 45-degree angle to the surface and move in the direction your needle grouping allows—pulling toward you for liner cartridges creates the cleanest strokes. Control your needle depth by adjusting the machine’s needle protrusion setting; for PMU work, a depth between 0.5 and 1.5 millimeters prevents going too deep while ensuring pigment implants into the correct skin layer. Apply consistent, light pressure and let the machine do the work rather than forcing the needle downward. Move at a steady pace—too fast leaves gaps in pigment deposit, while too slow causes excessive trauma and ink oversaturation. After completing your practice session, dispose of the cartridge in a sharps container, wipe excess ink from the machine grip with a disinfectant wipe, and apply a thin layer of recommended aftercare ointment to your practice skin to simulate the healing process you’ll manage with future clients.
Building Your PMU Foundation with Quality Ink and Equipment
Choosing the best PMU ink for your easy tattoo kit isn’t just a purchasing decision—it’s the foundation that determines whether your work heals beautifully or becomes a cautionary tale. The right ink combines verified safety standards, consistent color performance, and precise viscosity that matches your specific equipment. By prioritizing ISO-certified, transparently formulated products with proven fade stability, you protect both yourself and anyone who sits in your chair.
Remember that compatibility between your PMU ink and tattoo cartridges directly affects your learning experience. Test before committing, seek professional recommendations over marketing hype, and invest in bundled kits where manufacturers have already calibrated ink viscosity to machine performance. Once your equipment arrives, follow disciplined setup protocols and practice deliberate technique on synthetic skin before advancing to real clients. Every professional artist started exactly where you are now—the difference between those who succeed and those who quit early often comes down to working with quality materials that deliver predictable results. Trust the process, respect the fundamentals, and let your ink work with you as you build the skills that turn practice into artistry.